سنتحدث في هذا الدليل عن طريقة استيراد الوسائط وكيفية استخدام أداة Instant Cutter من Filmora9 لاستيراد الملفات الضخمة والطريقة الصحيحة لترتيبها بشكل منظم.
استيراد الوسائط إلى مشروع واحد
تسمح لك أداة Filmora9 بإضافة ملفات وسائط إلى المشروع بطرائق مختلفة، وأسهل هذه الطرائق هي النقر على زر Import Media Files Here من علامة الجدولة "Media".
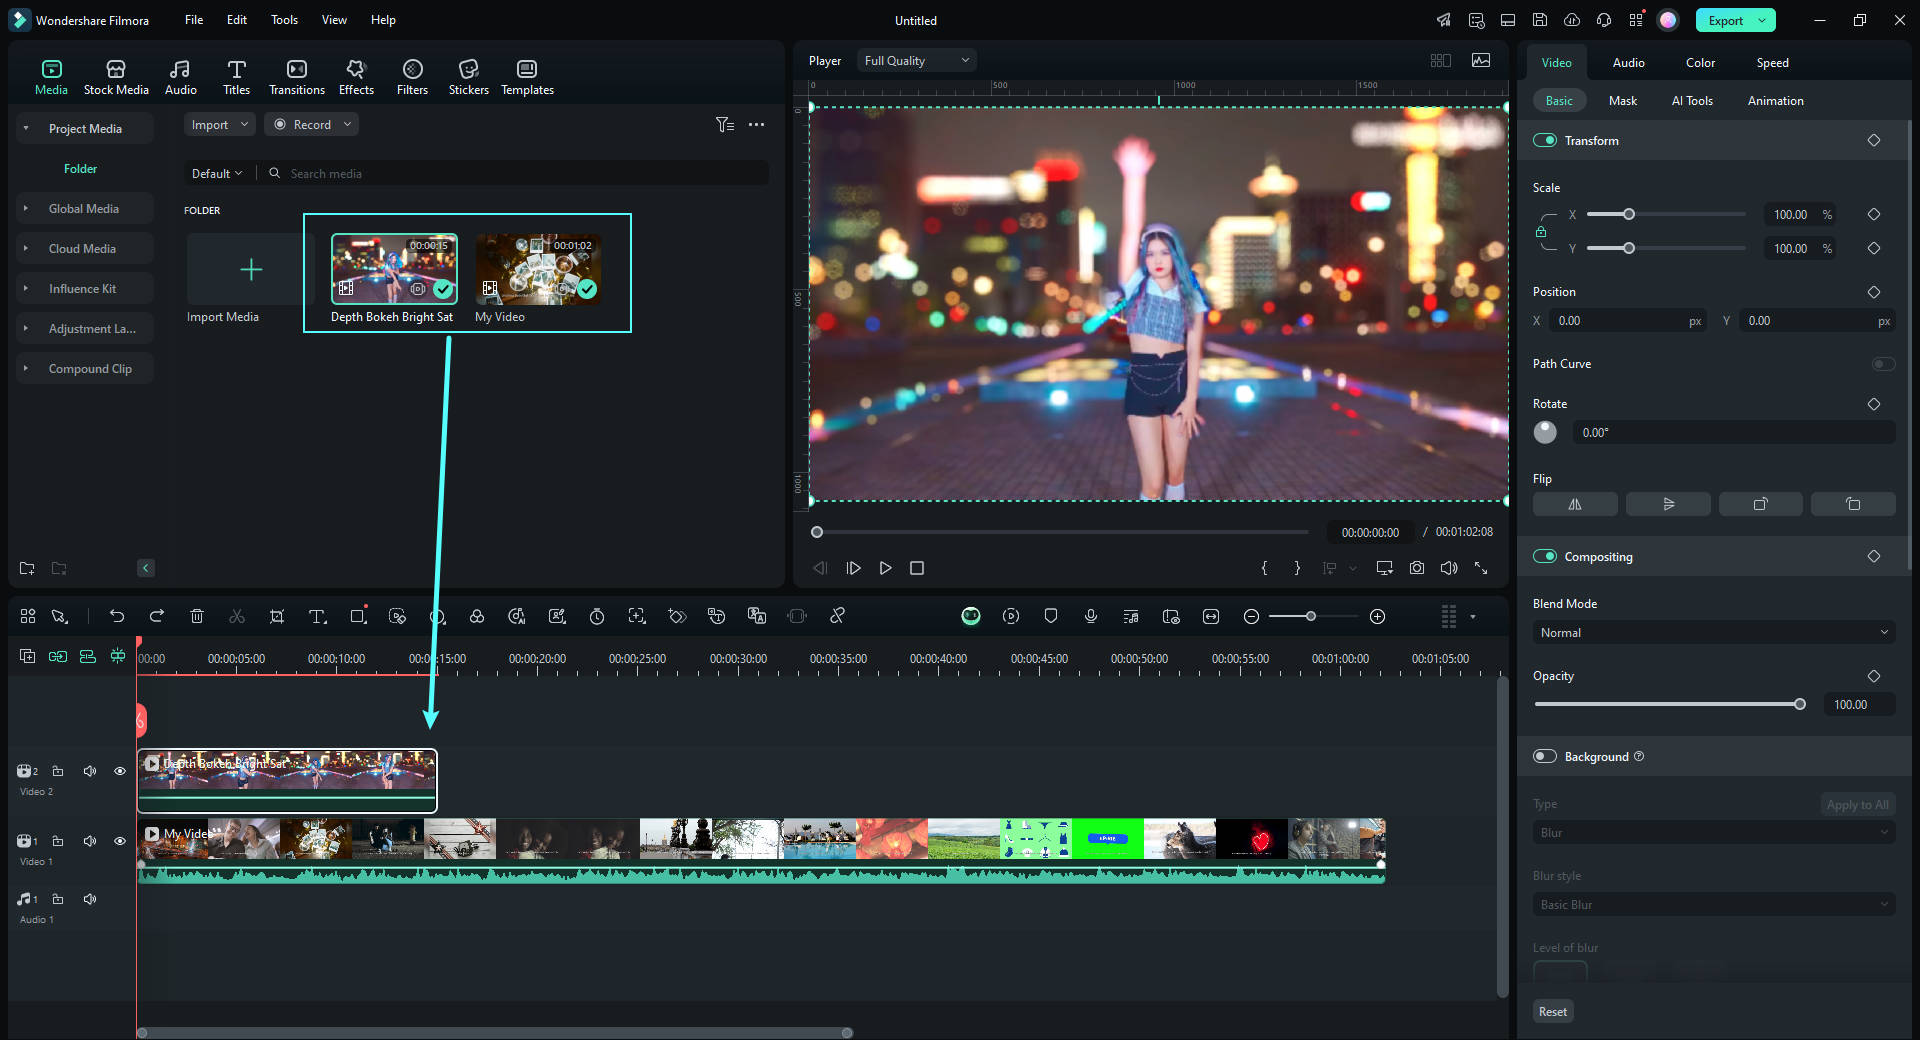
ومن بعد ذلك، سيترتب عليك التوجه إلى المجلد الذي يتضمن ملفات الوسائط المراد استيرادها، ثم النقر على OK. اتجه الآن إلى القائمة المنسدلة لخيار Import إن كنت ترغب باستيراد الوسائط إلى Filmora9 مباشرةً من الكاميرا أو وسائل التواصل الاجتماعي أو من جهازك المحمول.

كما يسمح لك Filmora9 باستيراد مجلد بأكمله إلى المشروع، مما يسرِّع عملية استيراد عدد كبير من الملفات إلى علامة الجدولة "Media". وتوجد طريقة بديلة لاستيراد الوسائط وهي بسحب الملفات من المجلد وإسقاطها في علامة الجدولة "Media".
باستخدام أداة Instant Cutter
انقر على خيار Import With Instant Cutter Tool من قائمة Import المنسدلة إن كنت ترغب بتقديم الفيديو بسرعة.

بعد ظهور Instant cutter على النافذة ستتمكن من النقر على زر Open File الموجود في علامة جدولة "Trim" في الزاوية العليا يمين النافذة. ثم حدد ملفات MP4 التي ترغب باستيرادها وانقر على زر OK.
وستتمكن من معاينة الفيديو في الجهة اليمنى من نافذة Instant Cutter، كما ستجد الجدول الزمني بالأدنى من نافذة المعاينة وبإمكانك استخدام رأس التشغيل للتمرير عبر الفيديو.
انقر على أحد المقابض الزرقاء في نهاية الجدول الزمني لقص مقطع الفيديو ولتحديد الجزء الذي ترغب باقتصاصه.
توجه إلى علامة الجدولة "Merge" إن كنت ترغب بدمج عدة فيديوهات وتحريرها باستخدام أداة Instant Cutter، ثم حدد الملفات التي ترغب باستيرادها ونظمها بالترتيب الذي ترغب أن تظهر به في الفيديو النهائي. لكن تذكر أن الفيديوهات الموجودة في الأعلى ستظهر أولاً والفيديوهات الموجودة في الأسفل ستظهر في الأخير.
بعد الانتهاء من ترتيب مقاطع الفيديو، انقر على زر Export والآن في نافذة "Export" ستتمكن من تغيير اسم الملف وتحديد مكان حفظ المقطع الذي تعمل عليه.
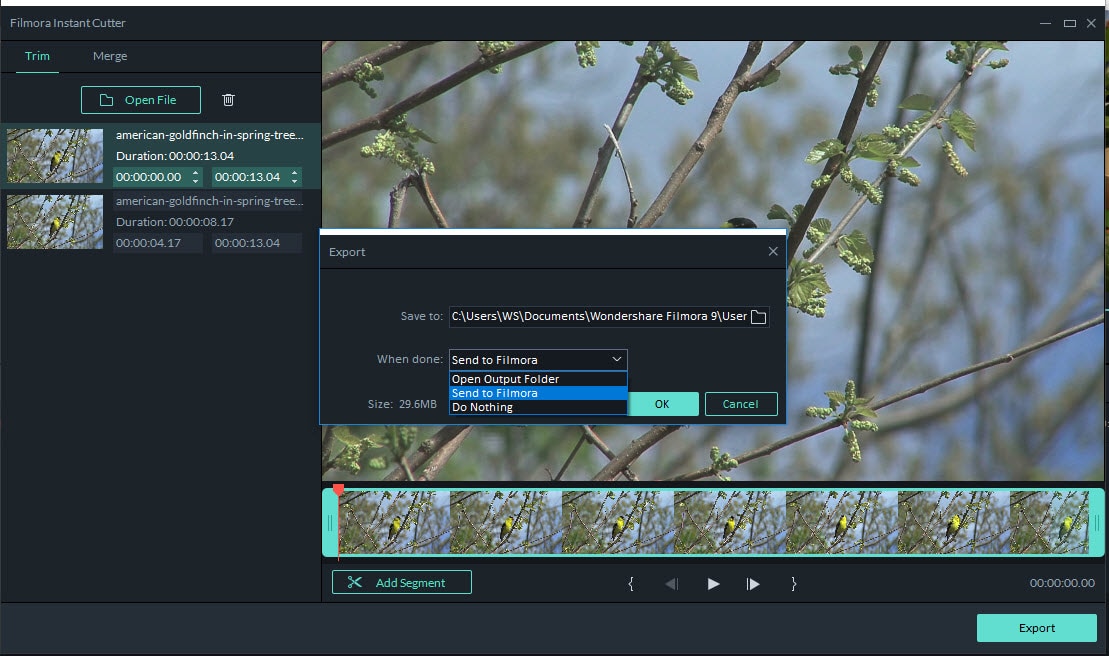
توجه الآن إلى قائمة When Done المنسدلة وانقر على خيار Send to Filmora لإرسال المقطع إلى Filmora9، أو انقر على خيار Open Out Put Folder لفتح المجلد الموجود فيه الفيديو.
تنظيم ملفات الوسائط
في المشاريع الكبيرة، ستجد نفسك تتعامل مع عدد كبير من ملفات الوسائط المختلفة، وستسمح لك أداة Filmora9 بتنظيم هذه الملفات بسهولة كي لا تضيع وقتك الثمين في البحث عليها. انقر على خيار View لتصل إلى خيارات View وSort by وGroup by.
ستجد الأيقونة بالقرب من شريط البحث في الزاوية من أعلى اليمين في علامة جدولة media في Filmora9، الآن اتجه إلى قائمة View وانقر على خيار List View إن كنت ترغب بإعادة تنظيم الوسائط ورؤية الدقة ومعدل لقطات الشاشة وغيرها من المعلومات عن مقاطع الفيديو التي ترغب باستيرادها.

يسمح لك الخيار Filter by Type الموجود بالقرب من خيار View بتحديد نوع الملفات التي ستعرض في علامة جدولة "Media"، وذلك لتتمكن من مشاهدة الصور والمقاطع الصوتية وملفات الفيديو بشكل منفصل.
وفي الزاوية السفلية اليسرى من علامة جدولة "Media"، سترى خيار Create a new folder وخيار Delete folder أيضاً. إن حفظ بعض اللقطات في مجلدات مختلفة سيساعدك في تحرير فيديوهاتك بشكل أسهل. انقر على المجلد الذي أنشأته بنقرة يمينية لإعادة تسميته، وذلك لترى ما نوع الوسائط الموجود فيه.

وفي حال لم تعد بحاجة للمجلد الذي أنشأته سلفاً، يمكنك تحديده ومن ثم النقر على خيارDelete folder لحذف المجلد.